|
The DV2000/DV4 can link to an NEC Univerge 3C PBX using a TCP connection where the VMS is the client. This link uses the protocol and features listed in the table below:
Link Type
|
Protocol Used
|
Log File Prefix
|
Features Supported
|
TCP client
|
NEC SOAP interface
|
HOSTEL
|
Name change, Set user rights group (phone COS), DND
|
Configure the Link
To configure the physical link to the PBX, follow these steps:
1. Using Activity Monitor, stop the voice mail service.

2. Run the System Configuration application and select Features | Connectors.

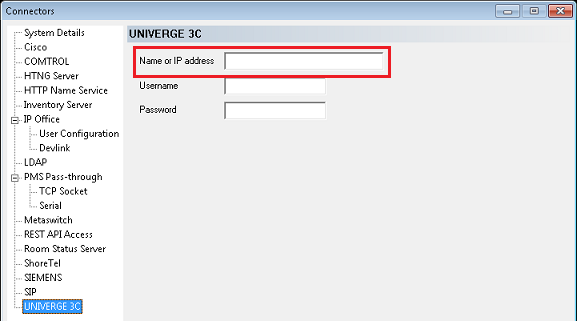
3. Select the UNIVERGE 3C property page.
| 4. | Enter the IP address or server name of the PBX in the Name or IP address box. |
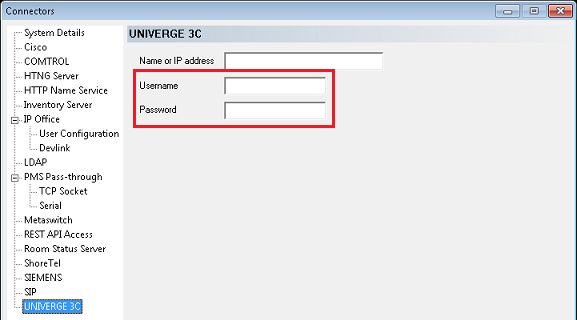
| 5. | Enter the Username and Password required to login to the PBX. |
6. Click OK to save your changes and close the Connectors dialog.
7. Continue to the next section to configure the hospitality settings.
Configure the Hospitality Phone Control Settings
After you have configured the connector settings for the Sphere link, you need to configure the hospitality service to use the Sphere connector and you also need to configure the phone control settings.
To do so, follow these steps:
| 1. | Select Features | Hospitality. |
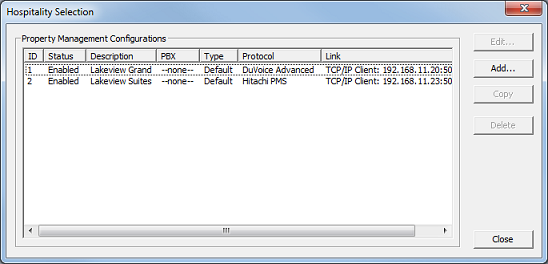
| 2. | If prompted, select the PMS instance (as shown below). This dialog is only displayed if you are licensed for more than one PMS instance. Otherwise, skip to step 3. |
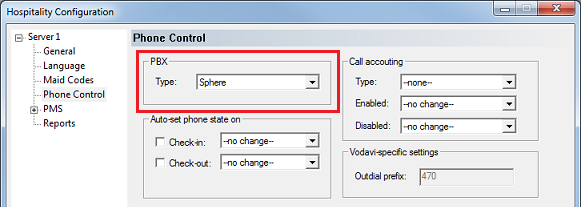
3. Select the Phone Control property page.
4. In the PBX section, use the Type drop-down list box to select Sphere.
| 5. | If you are not using Hansen CASH or Metropolis call accounting, skip to step 6. If you are, use the Type drop-down list box in the Call accounting section to select the call accounting software. Then use the Enabled and Disabled boxes to select the appropriate COS (or call restriction level) to send to the PBX when the call accounting software signals that the room phone should be enabled or disabled. |
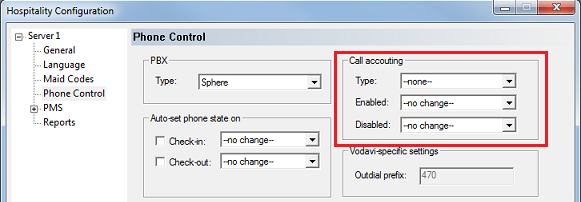
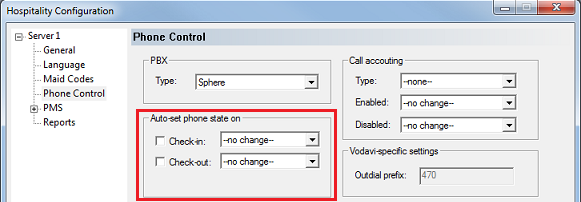
| 6. | In the Auto-set phone stat on section: If your PMS sends messages to the VMS to change the phone COS, or if you enabled the call accounting settings in step 5, make sure both check boxes are unchecked. However, if you aren't using call accounting and your PMS protocol does not offer a message command for setting the phone COS, you may wish to enable both options and use the associated drop-down list boxes to select which phone COS (or restriction level) to send to the PBX when the room is checked in and when it is checked out. The --no change-- option acts the same as unchecking the check boxes. |
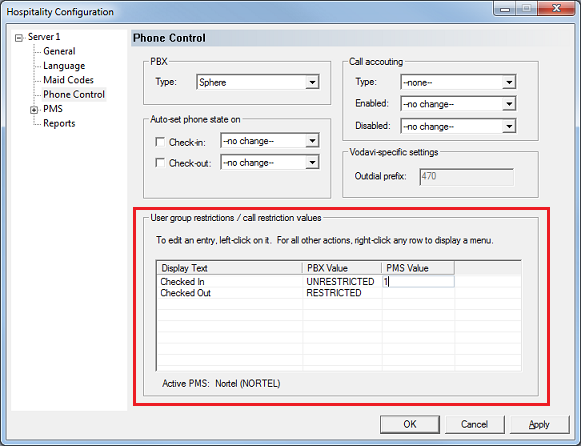
| 7. | In the User group restrictions section: When you selected Sphere in step 4, above, the system automatically reset the entries in this table to default values. You may need to change the PBX values to match the appropriate user rights groups that you defined on your PBX. You will also need to enter the correct matching values for your PMS in the PMS Value column. To enter a PMS value, click in the box under the PMS Value heading for the row that has the matching PBX value. Then enter the value exactly as the PMS will send it (typically, this will be a single digit number). Repeat for each PMS value. Each PMS value must be entered in the table only once; it is not necessary to enter a PMS value for every PBX value. You can change the Display Text as well if you wish; this is what will be displayed in InnDesk. |
8. Click OK to save your changes and close the dialog.
9. Once you are finished with all configuration changes, close System Configuration.
10. Using Activity Monitor, restart the voice mail service.

|


